#altenew, Uncategorized

AECP Family Instagram Hop

Welcome to an AECP Family Hop where we are sharing the Altenew Academy class which has inspired us the most.

We are all at various points in our AECP journey, but we are united in wanting to celebrate the inspiration and knowledge we’ve gained from the classes in Altenew Academy.

~~~~~~ GIVEAWAY ~~~~~~

Altenew is generously sponsoring this hop and to be in with a chance to win one of FOUR $25 gift certificates to their online store. You will find all details and the hop list of designers over my IG account.

To be honest, I loved many classes so I decided to put a lit bit of three of them on this card: “All About Layering”, “Creating Watercolor Media” and “Let It Shine”.

Let’s start!

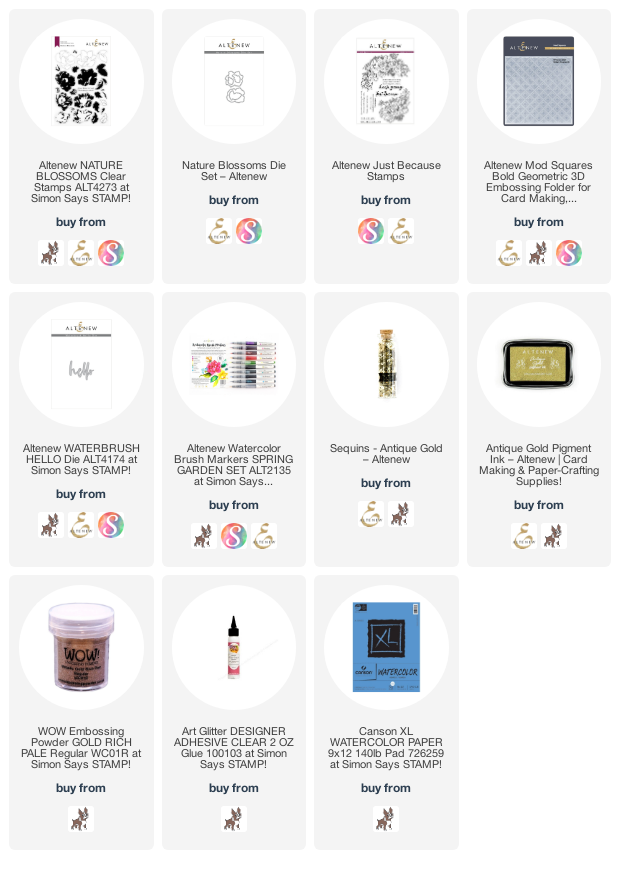
To create my background I used Watercolor Brush markers and I made this organic look with lots of splatters but I didn’t covered the whole panel so the background would have some movement. The colors of watercolors I used on the panel are Rubellite, Midnight Violet and Emerald. These colors belong to the Spring Garden set.

Once my panel was dry, I placed it inside the Mod Squares 3D Embossing Folder and run it through my die cutting machine. Next, I added a white folded note card at the back using glue.

Then, I added some touches of Antique Gold Pigment over the embossed panel. Additionally, I gold heat embossed some flowers and leaves from the stamp set Nature Blossoms. I watercolored these flowers and leaves using more of the Watercolor Brush markers. The colors I used were Fresh Lemon, Sunkissed, Emerald and Desert Night. Using the matching die I die cut all these images.

I arranged all flowers and leaves on top of my panel using glue and foam tape. Also, I die cut the Waterbrush Hello Die out of golf foil paper and placed it on top of my arrangement. Finally, I watercolor a piece of watercolor paper using Emerald Watercolor Brush marker and once it was dry I gold heat embossed my sentiment and added it to my background along with some sequins and this card was finished.

I hope you like this card and get some inspiration. You will find all the products I used down below. Don’t forget to participate in the IG Hop and leave some love to the other designers. Thank you so much for stopping by and have wonderful weekend!

Your friend , Karen


https://linkdeli.com/widget.js?id=f5e8378456858c916708

#altenew, #cardmaking, Uncategorized

Creative Watercolor Media | Altenew Academy

Hello friends! I had such relaxing time making this card using ink sprayers from Altenew. This card is part of the Creative Watercolor Media and the lesson that I wanted to try had re-inkers but since I don’t have them I decided to use ink sprayers. I would never thought of using ink sprayers to watercolor but I’m glad I tried this, the inks worked wonderfully! And this is another way to stretch your craft supplies.

The stamps and dies for this card are the following: Nature Blossoms and Pinstripe. The ink spray colors are: Lavender Fields, Warm Sunshine, Forest Glades and Ocean Waves.

Let’s begin! On an A2 watercolor panel I added water using a brush, then I sprayed Lavender Fields ink spray on top and more water to move the ink. As my personal touch, I added some strokes with another brush leaving marks of the brush around. Additionally, using the same Lavender Fields ink spray I added some splatters. Last but not least, more splatters of white and gold ink were added because I love splatters on my panels.

Next, I stamped the rounded images from the Pinstripe Stamp Set and heat embossed them using a metallic gold embossing powder. I totally love the mix media look that my background has. Once my panel was dry I trimmed down the edges and adhered a folded note card at the back using glue.

Now let’s move to the flowers. On a piece of watercolor paper I stamped the detailed stamps of the flowers and leaves from Nature Blossoms Stamp Set using an embossing ink and then I heat embossed them with a metallic gold embossing powder. I watercolored the flowers using Warm Sunshine ink spray and for the leaves I used a mix of Forest Glades and Ocean Waves ink sprays. Also, I brought back some tips I learned on Level 1 and added some details to the flowers using a colored pencil.

Finally, I die cut the flowers and leaves using the matching dies and arranged all these elements on top of my background using glue and double aided foam tape. I stamped the sentiment THANK YOU from the Pinstripe Stamp Set using black ink and I also adhered it next to the flowers. Some Crystal Clear Nuvo drops were added and this card was finished.

This class have many great tips for watercoloring using different medias in very creative ways, which is really helpful and fun. Also, from the ink leftovers I was able to create two more backgrounds by splotching the ink, isn’t that awesome?!

I hope I can inspire you with this card and thank you so much for stopping by! Have a marvelous day!

Your friend, Karen

#altenew, #cardmaking, Uncategorized

In a Twist | Altenew Academy

Happy Friday! For today’s card I have this lovely technique called Faux Embossing with Die Cuts and it’s part of the With A Twist class from Altenew Academy. On this lesson I have learned how to take your products and think different ways to get the more out of them. I have used Cherished Memories Stamp and dies, Be Kind Stamp Set and Nesting Labels Die Set. To add color I used Zig Clean Colors Real Brush Markers.

Let’s begin! I started by stamping the flowers and leaves from Cherished Memories Stamp Set using black ink. I used Bristol Smooth watercolor paper. Next, I colored them with the Zig Clean Colors Real Brush Markers and a fine watercolor brush. I really love how this flowers turned out!

Once I finished coloring I die cut all flowers and leaves using the matching dies from the Cherished Memories Die set. Then, I arranged all elements on top of an A2 folded notecard until I was happy with the placement of each element. I made sure the leaves and flowers were peeking out of the panel and placed evenly around, then I secured each of them with liquid glue.

In addition, I stamped the sentiment from Be Kind Stamp Set onto a colored cardstock that matched the greens and flowers of my background. I used black ink and then I placed one of the dies from Nesting Labels Die Set on top and run this throughout my die cutting machine. Finally, I added to my background using glue and this card was finished. You can take a closer look of the faux embossing look in the last two pictures.

Remember that this technique works great when you have a tone on tone card so you can get that embossed look with the die cuts even if you color the die cuts. Also, you will need the coordinating dies because fussy cutting won’t look so good and definitely you won’t get this Faux Embossing look.

I really love this card and this technique is absolutely relaxing and fun, I hope you give this a try and thank you so much for stopping by.

Your friend, Karen

#altenew, #cardmaking, Uncategorized

Beyond the Backgrounds | Altenew Academy

Hello friends! Today I’m sharing this card part of the Altenew Academy. On this class, Beyond the Backgrounds I learned fun tips to create wonderful backgrounds. I love working on my backgrounds so this class was perfect for me. So I decided to go for the DIY Stencil, which was a really fun and very creative technique.

For this card I used Nature Blossoms Stamp and dies, White Embossing Powder, Waterbrush Hello Die and Just Because stamp for my sentiment. The inks used are the following: Soft Lilac, Midnight Violet, Misty Morning and Nimbus.

Let’s begin, to create the stencil I placed the smallest rose die and leave die, from Nature Blossoms coordinating dies, on an A2 panel and I die cut both of them several times covering the whole panel. To make my background more interesting I placed the dies off the side of the card, this was a great tip from Lydia!

Next, when I finished die cutting I die cut another piece of cardstock slightly larger than my diy stencil. I placed the stencil on top of this panel and secured the edges with washi tape. Before applying the ink onto the flowers, I covered the leaves using the negative parts from the die cutting so I don’t accidentally transfer ink to the leaves. Then, using a blender brush I applied first Soft Lilac ink into the flowers and at the center I added Midnight Violet ink which was the darker ink. I repeated the same process with the leaves but using Misty Morning and Nimbus inks, this last one was applied at the bottom of each leave. You can see the final result in the picture above.

Then, once the ink was dry I added anti-static powder to my panel and I stamped the smallest outline flower and leave stamps from Nature Blossoms Stamp Set using embossing pad. Next, I heat embossed all flowers and leaves using a white embossing powder and you can see how this background looks in the picture above.

I die cut the Waterbrush Hello Die three times of white cardstock. Then, on a piece of white cardstock I applied Midnight Violet and Nimbus inks using a blender brush and I die cut another Hello die out of this piece of cardstock. This way my word die will match my color combo on this background.

I added all three white die cuts from the Hello die behind the colored die cut using glue. This stack of dies will give more dimension to the hello word. I placed a piece of vellum at the top of my background and the hello stack of dies on it. Also, I stamped the sentiment “You Are Fabulous” from Just Because Stamp Set using black ink and added on top of the stacked hello with a few sequins around and this card was finished.

This was a wonderful class with great tips for your everyday cardmaking. Hope you like my card and thank you so much for stopping by! Have a fabulous day!

Your friend, Karen

#cardmaking, Uncategorized

Picket Fence Studios October Release is Here!

Hello crafty friends! Today the Picket Fence Studios Design Team is so excited because the October release is here! We have lots of inspiration and great ideas for you! I also have a video tutorial at Picket Fence Studios YouTube channel featuring the new Honey Dear Stamp, I Bee Fierce Stamp and Honeycomb Stencil. Let’s start!

For my first card I created a background using Distress Oxide inks: Fossilized Amber, Spiced Marmalade, Seedless Preserve and Wilted Violet. Once it was dry I placed the Honeycomb Stencil on top and applied Nuvo Moonstone Glimmer Paste using one of the new Mixed Media Spatula from Picket Fence Studios and let it dry overnight.

Once it was dry I trimmed down a little bit the edges and then I adhered a white notecard at the back of the panel using liquid glue.

I stamped the sentiment from Honey Dear on vellum and heat embossed it using WOW! Metalline Perfect Plum Embossing Powder. I adhered this piece of vellum to my background using double sided tape. Finally, I stamped the image from the same stamp Honey Dear using Picket Fence Studios Black Hybrid Ink, I colored it using Copic markers and die cut using the matching die. Next, I added foam tape at the back and added to my card and this card was finished.

For my second card I created a shaker card, the process is bit difficult for me to explain so I recommend you to watch the video at Picket Fence Studios YouTube channel for all details. Let’s continue, I started by placing the Honeycomb Stencil on top of a white Strathmore panel and applied Golden Rose and Daffodil Yellow Paper Glaze on top using one of the new Mixed Media Spatulas from Picket Fence Studios and an stencil pad. I let it dry for 20 minutes and then applied heat using a heat gun to speed up the drying process.

To create the shaker window opening I used one border die. I placed this border die on top of my panel and run it through my die cutting machine then I repeated the same step, but this time I placed the border die a little bit below the first cut.

I put double sided tape around the opening of the shaker window at the back of this panel and also a piece of any plastic packaging big enough to cover the opening. I left some space to fill it with Black Russian Sequin Mix. Next, I closed this space and added foam tape around the back of this panel to adhered it to a white notecard.

I stamped one of the sentiments from I Bee Fierce Stamp Set on black cardstock and white heat embossed it using WOW! Opaque Bright White Embossing Powder and placed it at the bottom of the shaker window using double sided tape. Finally, I stamped the bees with more Black Hybrid ink, Copic colores them and die cut each of them using the coordinating dies and this card was done! Remember to head over to YouTube channel to watch a full tutorial from these two cards.

This is another card I created featuring the new Sponsored by Coffee Stamp Set and Die. My background was creating using paper glaze over Down to the Last Drop Stencil.

For this set I used the new Ash, Maple and Oak Leaves Dies. You have three different designs and two sizes. These dies are gorgeous!

On this card I’m featuring the new Slim Line Rainbow Stencil.

Here I have the new Coffee Cup Stencil. I applied WOW! Embossing Pad through the stencil and then heat embossed it using WOW! Embossing Glitters.

#cardmaking, #misti

You are Awesome | My Sweet Petunia

Hello crafty friends! Today I’m stopping by My Sweet Petunia Blog to share this card using my new Original MISTI and stamp and dies from Pinkfresh Studio. For this card, I’ll be stamping the layering stamps on the negative die for a perfect line up and placement.

#cardmaking, #misti

My Sweet Petunia Blog Hop in Collaboration with Pinkfresh Studio + GIVEAWAY

Hello crafty friends! I’m so excited to be participating in this Blog Hop in Collaboration with My Sweet Petunia and Pinkfresh Studio. Today I’ll be sharing two cards that I made for this hop. Both cards have the same steps to follow, just different color combinations and they match perfectly!

PRIZES

My Sweet Petunia and Pinkfresh Studio will be giving away $50 shopping sprees to each company’s store, and those winners will be announced on each company’s blog this August 14th!

#cardmaking, #wowembossingpowder, Male cards

Teals and Blues for Masculine Cards | WOW! Embossing Powder

Hello friends! Today I’m over WOW! Embossing Powder Blog sharing two male cards using blues and teals. I have created one more elaborated card and one more simple for those CAS lovers. I used the following embossing powders: Bang Embossing Powder, Metallic Silver Sparkle Embossing Glitter, Earthtone Blueberry Embossing Powder, Metallic Silver Embossing Powder and Mint Macaroon Embossing Powder along with Pinkfresh Studio and Altenew stamps, dies and stencil.

Let’s shine! For my first card I have a little bit more elaborated card and I placed the Altenew Deco Wallpaper Stencil on top of a white panel and using a Life Changing Blender Brush I applied Altenew Aqualicious ink.

Next, after cleaning the Altenew Deco Wallpaper Stencil I put it on top of my panel again but this time I moved the stencil a little bit to the side and applied WOW! Embossing Pad. Then, I removed the stencil and added WOW! Bang Embossing Powder and heat embossed my panel using WOW! Dual Speed Heat Tool.

I adhered a white folded note card at the back. Also, I added a piece of vellum on top of the background. At the bottom and top of the vellum I put two strips of cardstock using glue.

Using the Kelly Alpha Lower Case Die I die cut the word HANDSOME. I decided to split the word and have the “hand” heat embossed with WOW! Earthtone Blueberry Embossing Powder and the “some” with WOW! Mint Macaroon Embossing Powder.

I placed the “hand” word on top of the vellum and the “some” word at the bottom part, leaving some space between these two words. Finally, I die cut a Hello from the Classic Words Die Set by Pinkfresh Studio and heat embossed it with WOW! Metallic Silver Sparkle Embossing Glitter. I placed this Hello die cut in between the “hand” and “some” words and my first card is finished.

For my second card I made a CAS card using almost the same colors from my first card. I stamp the Cling Rubber Stamp: Diamond Tiles using WOW! Embossing Pad and heat embossed it with WOW! Metallic Silver Embossing Powder.

Then, I stamped again this stamp but this time using Altenew Aqualicious ink. I totally loved the look!

Next, I die cut a circle die out of vellum and placed it on top of the background.

I die cut the HI word using the Kelly Alpha Lower Case Die. The “h” was heat embossed with WOW! Mint Macaroon Embossing Powder and the “i” with WOW! Earthtone Blueberry Embossing Powder. I placed both die cuts on top of the vellum circle die cut and finally I stamped and added the sentiment.

I really hope you got some inspiration to create masculine cards. These creations are also part of the WOW! Monthly Challenge for August. Enter your project and participate on the giveaway! Have a fabulous day!

Karen


https://linkdeli.com/widget.js?id=f5e8378456858c916708

#cardmaking, #wowembossingpowder

Pearl Gold Embossing Glitter | WOW! Embossing Powder

Hello friends! Today I’m sharing this card over WOW! Embossing Powder blog featuring WOW! Pearl Gold Sparkle Embossing Glitter. As you know our monthly challenge theme is Pearl Embossing Powders so I encourage you to enter your project and participate in the giveaway at the Facebook Fan page.

Let’s shine! I started by applying Sea Shore mini cube ink set to an A2 panel using the Life Changing Blender Brushes. Then, I die cut the Pinkfresh Studio Pretty Frames 2 Die using white cardstock and I only adhered the largest frame to my A2 panel.

Next, I die cut three times the Ornate Oval Frame Die from Pinkfresh Studio using white cardstock and I only added WOW! Embossing Pad to one layer and then heat embossed it using WOW! Pearl Gold Embossing Glitter. I glued the three die cuts one on top of each other using glue and added them on top of the panel.

Here you can have a closer look of all the shine from the WOW! Pearl Gold Embossing Glitter. As my next step, I stamp the Just A Little Lovely stamp set from Pinkfresh Studio using WOW! Embossing Pad and heat embossed it with WOW! Metallic Gold Embossing Powder.

I colored this image using Copic markers. Once I was finished coloring I placed this image on top of the panel using foam tape and added some details of Nuvo Crystal drops.

I also die cut the You Die from Pinkfresh Studio out of white and teal cardstock. I used the teal color to create a shadow for the white You die cut. Using glue I adhered this die cut to my background.

Finally, I stamped a sentiment from the You Stamp Set from Pinkfresh Studio using a teal ink and added to my panel along with some jewels and some wink of Stella to the flowers. A folded note card was adhered at the back and my card was finished.

I hope you enjoyed this blog post and thank you so much for stopping by. Have a wonderful weekend!

Karen


https://linkdeli.com/widget.js?id=f5e8378456858c916708

#altenew, #cardmaking

Beautiful Details | Altenew Academy

Hello friends! Today I’m presenting this card part of my Beautiful Details Class. I’m amazed with this class, it’s absolutely something totally new and different that I have ever tried. This class taught how to go beyond with my stamps and use them in a very creative way that pushed me to go out of my comfort zone. I also must say that Marika Rahtu is way too talented!

Let’s start! Each lesson on this class was amazing but I got captivated with Lesson 1 – Artistic Flowers, where you can use your solid stamps in new ways, using Tombow markers to stamp and then adding more details with a black fine pen, like a multiliner. This way you can stretch up your stamps and get more out of them.

I had no stamps that I thought will work for this technique and I was debating about to ordering a new stamp set, however I didn’t want to wait. So I did an extensive search through all my Altenew products and I find these small stamps, Billowing Blossoms and A Gift for You Stamps, that I kindly received from Altenew as a gift on different holidays, and I thought they were perfect! So I used some images and stamped them trusting my inner artist. This was so pleasant and relaxing.

For some stamps I only colored part of the images and used second and third generation stamping, that way you can get lighter and darker layers while stamping. I used Tambow markers in the shades of grey and one purple.

After finishing stamping and creating this flowers, I used a Black fine pen to add more details and I even outlined some parts of the flowers. There’s no right or wrong way to do this, so I definitely enjoyed the process.

Next, I stamped my sentiment from Beautiful Blossoms stamp set using black ink. Then, I applied Hydrangea ink only to two corners of my panel using a Life Changing Blender Brush. Finally, I trimmed down a little bit my panel and adhered a white folded note card at the back plus some Nuvo Crystals drops.

Before I started stamping I decided to practice a lot bit on a piece of cardstock and when my first card was finished I saw the piece of cardstock where I practiced and I loved it so much that I decided to make a second card out of it.

You definitely have so many possibilities to use your stamps creatively and get the most out of them. I recommend this class to everyone! It’s so therapeutical that you will love it!

Thanks for stopping by and have a fantastic day!

Karen